January 5th, 2015 by Smile Harney
Ever wish to upload the MP4 video recorded to share with your friends, only to find it's too large to upload to most video-sharing websites? Ever dreamed to enjoy the downloaded amazing MP4 video offline on your portable devices like iPad, iPhone, etc., but be told memory space can't handle that large MP4 file?
If so, you must confront the issue how to compress the MP4 video. In the market, there are countless MP4 Compressors guiding you how to compress MP4 video, however, many of which failed due to the complicated instruction. As the common users, we are not equipped with the professional codec things.
In this passage, we'd like to highly recommend an easy-to-use MP4 Compressor - iDealshare VideoGo. With only three steps, you can successfully reduce MP4 to smaller file size without changing the video quality.
The following is a step by step guide on how to compress MP4 to smaller file size. Furthermore, other formats like MPEG, MKV, AVI, MOV, MPEG2, MOV, VOB, FLV, 1080p, AVCHD, WTV, MXF, MVI can also be compressed.
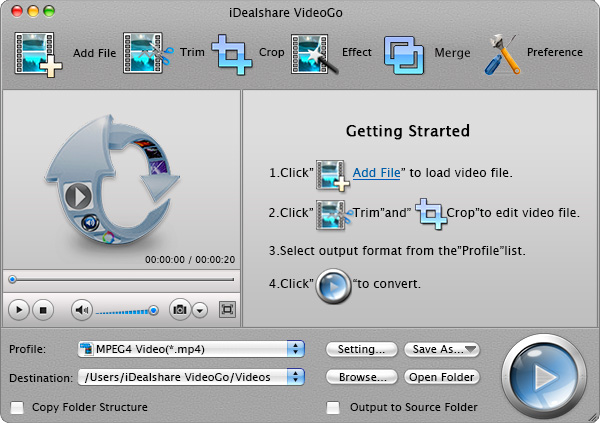
Free download the professional MP4 Compressor for Mac or Windows - iDealshare VideoGo (for Mac, for Windows), install and run it, the following interface will pop up.

Click the "Add File" button to import the MP4 video which you like to compress to smaller file size.
Or simply drag and drop MP4 clips into this professional MP4 compressor. You can also batch import multiple MP4 files.
Click the "Setting..." button, then a window will appear on the right side. Go to the "Advanced" tab, and click the "Video Bitrate". You can choose video Bitrate in the right drop-down column.
Tips: It is known that the smaller the bitrates, the more you compress the video and the worse the video quality gets. So please define the appropriate one.

Click the BIG ROUND button at the right bottom side to start and finish compressing MP4 file size.