March 6rd, 2015 by Smile Harney
Acting as a professional screen recording and video editing software, Camtasia Studio can capture any screen movements and actions, including image, audio, cursor, etc and can directly edit the recorded file, including adding various labels, media library, pan-and-zoom, PIP, voiceover, subtitle effects, etc. Besides directly editing the recorded file, Camtasia Studio can also support to edit the videos people import. The following video formats are supported by Version 8 and later version when importing videos to Camtasia Studio:
So if you want to import AVCHD, all MP4, MKV, FLV, all SWF, MPEG-2, VOB, MXF, MPG, MOD, WEBM into Camtasia Studio, you must convert or re-record them into one of Camtasia Studio supporting formats, like AVI, mp4/h.264 (AVC) or WMV formats.
When doing Camtasia Studio conversion, you will need a Camtasia Video Converter. Users will recommend iDealshare VideoGo for its powerful functions. iDealshare VideoGo can assist you to convert AVCHD, all MP4, MKV, FLV, all SWF, MPEG-2, VOB, MXF, MPG, MOD, WEBM to Camtasia Studio with no efforts. Now follow the step by step guide set out below to convert AVCHD, all MP4, MKV, FLV, all SWF, MPEG-2, VOB, MXF, MPG, MOD, WEBM to Camtasia Studio.
Guide to Convert and Import Video to Camtasia Studio
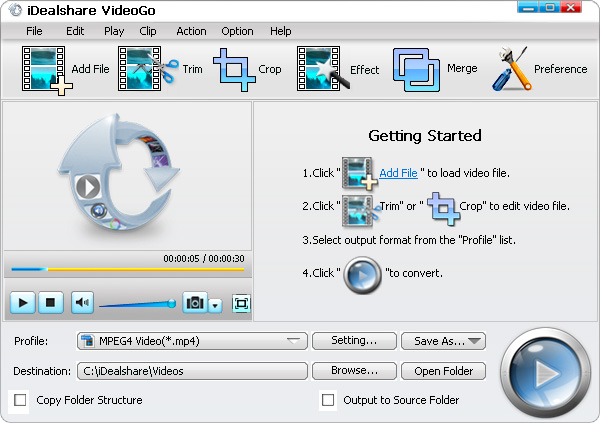
Free download the powerful Camtasia Video Converter - iDealshare VideoGo(for Mac, for Windows), install and run it, the following interface will pop up.

Click "Add file" button to load the files like AVCHD which are needed to convert and import to Camtasia Studio.

Click "Profile" button to select one Camtasia Studio supporting format, AVI, mp4/h.264 (AVC) or WMV formats are recommended.
Click "Convert" button to complete the conversion to Camtasia Studio
With iDealshare VideoGo you can import any video from any source to Camtasia Studio and then customize and edit into your own video for sharing with your clients, your students or your friends.